News
News  Market Data
  Discover
Support: 888-992-3836
Copyright © 2023 InvestorsHub Inc.


Register for free to join our community of investors and share your ideas. You will also get access to streaming quotes, interactive charts, trades, portfolio, live options flow and more tools.
Big figure quote: The numbers to the left of the decimal point in an exchange rate

Daily Candlestick Chart for AXST
[img]stockcharts.com/c-sc/sc?s=AXST
Irrational Exuberance Ties with Technical Analysis
Many of the theories put forth in this book fall in the realm of behavioral finance or behavioral economics. Behavioral finance is considered a branch of technical analysis. In fact, Irrational Exuberance was required reading for the Chartered Market Technician (CMT) exam on 2011. Behavioral finance is an attempt to understand the behavior of investors and institutions when investing in stocks, bonds, real estate, tulips or other securities. What prompts individuals to buy or sell a security? How do investors handle risk or loss? Why do speculative bubbles appear and then burst? Is there such thing as the dumb money and the smart money? Shiller sheds light on the investing process by highlighting the key factors that led to Irrational Exuberance in the late 1990's.
Daily Candlestick Chart for BUKX
[img]stockcharts.com/c-sc/sc?s=BUKX
Bank of Japan (BOJ) Monetary Policy Monthly Report: Release schedule : 6:00 (GMT); in the middle of the month
Revisions schedule : None
Source of report : Bank of Japan
Web Address : http://www.boj.or.jp/en/
Address of release : http://www.boj.or.jp/en/theme/seisaku/handan/gp/index.htm
Runaway Gaps
Runaway gaps are also called measuring gaps, and are best described as gaps that are caused by increased interest in the stock. For runaway gaps to the upside, it usually represents traders who did not get in during the initial move of the up trend and while waiting for a retracement in price, decided it was not going to happen. Increased buying interest happens all of a sudden, and the price gaps above the previous day's close. This type of runaway gap represents an almost panic state in traders. Also, a good uptrend can have runaway gaps caused by significant news events that cause new interest in the stock. In the chart below, note the significant increase in volume during and after the runaway gap.

Runaway gaps can also happen in downtrends. This usually represents increased liquidation of that stock by traders and buyers who are standing on the sidelines. These can become very serious as those who are holding onto the stock will eventually panic and sell – but sell to whom? The price has to continue to drop and gap down to find buyers. Not a good situation.
The term measuring gap is also used for runaway gaps. This is an interpretation that is hard to find examples for, but it is a way of helping one decide how much longer a trend will last. The theory is that the measuring gap will occur in the middle of, or half way through, the move.
Sometimes, the futures market will have runaway gaps that are caused by trading limits imposed by the exchanges. Getting caught on the wrong side of the trend when you have these limit moves in futures can be horrifying. The good news is that you can also be on the right side of them. These are not common occurrences in the futures market despite all the wrong information being touted by those who do not understand it, and are only repeating something they read from an uninformed reporter.
Central Bank: Central banks play a key role in the currency markets because of their power over monetary policy. They have a direct influence over money supply, which in turn affects demand and price of the currency. Through the use of different policies, central banks can try to manipulate the markets so that they can keep their currency at specific levels. Some countries and their central banks try to peg their currency to that of another currency or basket of currencies (for example, China to the U.S.).
The central bank can participate in the forex market by buying and selling their currency at the spot market in order to keep it from changing too much. Another motivation for central banks is to keep the local currency at a specific price in order to make their local economy more attractive for international trade. If a country’s currency appreciates too quickly, it could actually make it less appealing to importers.
Remember that many transactions have to use the local currency. Thus, if currency that is needed rises too quickly, it effectively makes goods more expensive to foreigners, which in turn, hurts trade. To counter this, the central bank may intervene in the market by selling its currency and buying up other major currencies. This in effect, weakens the local currency so as to make it more appealing to foreign importers.
While the exact value of what percentage such central bank transactions take up isn’t known, take note that because these are the banks of national governments, such interventions can have a much larger impact on the market than any single commercial bank.
Daily Candlestick Chart for GRAS
[img]stockcharts.com/c-sc/sc?s=GRAS
What is More Important than Why
In his book, The Psychology of Technical Analysis, Tony Plummer paraphrases Oscar Wilde by stating:
A technical analyst knows the price of everything, but the value of nothing
Day Trading: Day trading with the foreign exchange market is in some ways vastly different to that in other markets, in addition to which, day trading in the currencies market does not suffer from the unpleasant connotation that may spring to mind when one thinks of such things with relation to the stock market.
That said, if you have previously traded in other markets, then many items styles utilized in forex, such as forwards, futures, options, spread betting, contracts for difference and also the spot market are very similar to those used in the equity markets, and often maintain a minimum trade sizes for the base currencies.
It is worth noting however that day trading, being a fast moving, highly challenging trading style may not be for everyone. Should decide that day trading is for you, then there are also many different styles and variations of day trading with the currency market that you may wish to sample before choosing the form that feels right for you, or maybe you will prefer to utilize a series of styles.
The best way to learn the day trading styles with regards to forex markets is the same as in learning and perfecting any other trading style, or indeed other skill; by practice.
Talking to you forex trading mentor and other experienced day traders to see what styles have worked best for them over the years, ask for any hints, tips and techniques that may be of benefit and try them out before making the definitive choice of which style will be right for you.
Daily Candlestick Chart for UNDT
[img]stockcharts.com/c-sc/sc?s=UNDT
Confirmation: A document that states the agreement of a transaction.
Daily Candlestick Chart for STAU
[img]stockcharts.com/c-sc/sc?s=STAU
Bullish: The term "bullish" is used to describe that a person's, or group's, outlook on an asset is optimistic (i.e., that the asset will rise in value).
For example, John is "bullish" on the British Pound, which means he thinks its value will go up in price
Exhaustion Gaps
Exhaustion gaps are those that happen near the end of a good up- or downtrend. They are many times the first signal of the end of that move. They are identified by high volume and large price difference between the previous day's close and the new opening price. They can easily be mistaken for runaway gaps if one does not notice the exceptionally high volume.
It is almost a state of panic if the gap appears during a long down move where pessimism has set in. Selling all positions to liquidate holdings in the market is not uncommon. Exhaustion gaps are quickly filled as prices reverse their trend. Likewise, if they happen during a bull move, some bullish euphoria overcomes trades, and buyers cannot get enough of that stock. The prices gap up with huge volume; then, there is great profit taking and the demand for the stock totally dries up. Prices drop, and a significant change in trend occurs. Exhaustion gaps are probably the easiest to trade and profit from. In the chart, notice that there was one more day of trading to the upside before the stock plunged. The high volume was the giveaway that this was going to be, either, an exhaustion gap or a runaway gap. Because of the size of the gap and the near doubling of volume, an exhaustion gap was in the making here.
stockcharts.com/school/data/media/chart_school/chart_analysis/gaps_and_gap_analysis/ExhaustionChart6.png
Daily Candlestick Chart for ABOT
[img]stockcharts.com/c-sc/sc?s=ABOT
Daily Candlestick Chart for TLFX
[img]stockcharts.com/c-sc/sc?s=TLFX
Diamond: The diamond formation, more commonly known as a diamond top, is a relatively rare chart formation used in technical analysis. When a diamond top forms, it forms at the conclusion of a long uptrend in price, and it indicates an imminent reversal of the trend. As such, the diamond top formation generates a very strong sell signal.
Traders and technical analysts recognize a diamond formation by first recognizing a head-and-shoulders formation (a peak and trough, followed by a higher peak and another trough, followed by a peak somewhere below the level of the previous peak: in other words, three peaks, the middle one being the tallest.) Four trendlines are drawn: one (ascending) from the first peak to the second peak, one (descending) from the second peak to the third peak, one (ascending) from the second trough to the low of the third peak, and one (descending) from the first trough to the second trough. The four lines altogether form a rough diamond shape, giving the chart its name.
The diamond top forms an overall descending trend channel, allowing traders to determine levels of support and resistance for the asset's price as it enters a downtrend or a momentary reversal. However, if the lower support line of the channel is broken, traders consider it likely that asset prices will reverse and begin again to climb.
EquiVolume Chart Calculation
An EquiVolume box consists of three components: price high, price low and volume. The price high forms the upper boundary, the price low forms the lower boundary and volume dictates the width. EquiVolume boxes are black when the close is above the prior close and red when the close is below the prior close.

Volume is normalized to show width relative to the look-back period. For a four month daily chart, each day's volume would be divided by total volume for the look-back period (four months). As such, the width of each box represents the day's percentage of total volume for the look-back period. Big volume days take up more space on the X axis (date). Chart 2 shows normal high-low-close bars with volume for Kraft Foods (KFT). It is a pretty normal looking chart with a normal X axis. Chart 3 shows this same four month period using EquiVolume boxes. The wide boxes show relatively high volume days, while the thin boxes show relatively low volume days. Also notice that many wide boxes can expand the entire month on the X axis. January is much wider on the EquiVolume chart than with normal high-low-close bar chart.


Daily Candlestick Chart for HEMP
[img]stockcharts.com/c-sc/sc?s=HEMP
Interpretation of Kagi Charts
The simplest way to interpret Kagi charts can be summed up by Steve Nison's expression Buy on yang, sell on yin. When the Kagi line goes from thin to thick, prices have just exceeded their previous important high – that's a bullish signal. The opposite is also true. When the Kagi line goes from thick to thin, prices have just fallen below their previous low, not a good sign for things to come.
Standard support/resistance, trend and chart pattern analysis techniques can also be used with Kagi charts. In fact it is often easier to locate strong support or resistance levels on Kagi charts because of their "clean" appearance.
Another interpretation technique mentioned by Steve Nison is to look for a sequence of nine (mostly consecutive) shoulders or waists. Traders look for strong counter-moves soon after the ninth shoulder or waist appears.
DeMarker Indicator: The Demarker Indicator is a technical analysis tool developed by Tom Demarker for identifying high-risk buying or selling areas in a given market.
Two variants of the Demarker Indicator exist, one bounded by values from -100 to 100, the other bounded by values from 0 to 1. The basic principle behind the Indicator is the same in either case. If the high price for a period is higher than the previous period's high, the DeMax variable for that period is the difference between the highs; the DeMin variable for the period works similarly for the low prices. The Demarker Indicator is then the moving average of DeMax divided by the sum of the moving averages of DeMax and DeMin. Thus, the higher the value of DeMax relative to DeMin, the greater the value of the Demarker Indicator.
On the 0 to 1 Demarker Indicator scale, a value anywhere above .7 indicates that a downward price turn is imminent, while a value anywhere below .3 indicates that the price will shortly turn upward. Values between .3 and .7 indicate relatively low-risk periods for entering a given asset market. Thus savvy traders can use the Demarker Indicator either to determine when to enter a market, or when to buy or sell an asset in order to capitalize on probable imminent price trends.
Daily Candlestick Chart for NFDS
[img]stockcharts.com/c-sc/sc?s=NFDS
Consolidation: Consolidation illustrates the lack of a trend in a particular trading range. It frequently occurs after downtrends or uptrends, and can be seen as a stretch of indecision. Consolidation draws to a close when price breaks through existing lines of support and resistance.
Daily Candlestick Chart for TFER
[img]stockcharts.com/c-sc/sc?s=TFER
Delivery Date: The date of maturity of a contract, when the final settlement of a transaction is made by exchanging the currencies. This date is more commonly known as the value date.
What Are Charts?
A price chart is a sequence of prices plotted over a specific time frame. In statistical terms, charts are referred to as time series plots.

On the chart, the y-axis (vertical axis) represents the price scale and the x-axis (horizontal axis) represents the time scale. Prices are plotted from left to right across the x-axis with the most recent plot being the furthest right. The price plot for IBM extends from January 1, 1999 to March 13, 2000.
Technicians, technical analysts and chartists use charts to analyze a wide array of securities and forecast future price movements. The word "securities" refers to any tradable financial instrument or quantifiable index such as stocks, bonds, commodities, futures or market indices. Any security with price data over a period of time can be used to form a chart for analysis.
While technical analysts use charts almost exclusively, the use of charts is not limited to just technical analysis. Because charts provide an easy-to-read graphical representation of a security's price movement over a specific period of time, they can also be of great benefit to fundamental analysts. A graphical historical record makes it easy to spot the effect of key events on a security's price, its performance over a period of time and whether it's trading near its highs, near its lows, or in between.
Daily Candlestick Chart for EXPU
[img]stockcharts.com/c-sc/sc?s=EXPU
Currency Pair: Two currencies that are used to make a trade
Daily Candlestick Chart for GLDG
[img]stockcharts.com/c-sc/sc?s=GLDG
Average True Range: Average True Range is one measure of volatility of a given market. The measure was created by J. Welles Wilder, Jr. in his 1979 book “New Concepts in Technical Trading Systems”.
Average True Range is based on the True Range, which is defined as the greatest of three measures:
•The difference between the greatest high and the greatest low
•The absolute value of the current high minus the latest close
•The absolute value of the current low minus the latest close
As a rule, fourteen measurements of the True Range are used in deriving the ATR. These measurements can be taken for four different time intervals: within a day, daily, weekly and monthly. The first ATR in a series is simply the average of the TR for fourteen periods. Future ATRs in the series are derived by the following algorithm:
•Multiply the previous 14-day ATR by 13.
•Add the current ATR.
•Divide the sum by 14.
The measurement is useful due to its sensitivity to large fluctuations in the value of a currency across several periods of measurement, even when the difference between the high and low values for a single period is very small (which would falsely indicate a low overall volatility.)
Clearing: The process of settling a trade.
Daily Candlestick Chart for SHMX
[img]stockcharts.com/c-sc/sc?s=SHMX
Assessing Management before Investing
In order to execute a business plan, a company requires top-quality management. Investors might look at management to assess their capabilities, strengths and weaknesses. Even the best-laid plans in the most dynamic industries can go to waste with bad management (AMD in semiconductors). Alternatively, even strong management can make for extraordinary success in a mature industry (Alcoa in aluminum). Some of the questions to ask might include: How talented is the management team? Do they have a track record? How long have they worked together? Can management deliver on its promises? If management is a problem, it is sometimes best to move on.
Daily Candlestick Chart for MDIN
[img]stockcharts.com/c-sc/sc?s=MDIN
Descending Trendline: Descending trendlines are a variety of trendlines, one of the most fundamental tools for technical analysis. Descending trendlines are simply trendlines with a negative slope, indicating falling prices. There are two types of descending trendlines: descending top trendlines, in which the high prices for an asset are falling, and descending bottom trendlines, in which the low prices for the asset are falling.
The rules for trading using descending trendlines are the same as the rules for trading with trendlines in general. A descending top trendline is a measure of the resistance to an asset's price, and traders consider a break in price through the descending top to be buy signal for the asset. A descending bottom trendline is a measure of the support in an asset's price, and traders consider a break in price through the descending bottom to be a sell signal for the asset. Many traders consider it necessary for additional signals to appear on the chart before a broken descending trendline is confirmed, and before those traders will take the appropriate market action.
Daily Candlestick Chart for ETLS
[img]stockcharts.com/c-sc/sc?s=ETLS
Support and Resistance Zones
Because technical analysis is not an exact science, it is useful to create support and resistance zones. This is contrary to the strategy mapped out for Lucent Technologies (LU), but it is sometimes the case. Each security has its own characteristics, and analysis should reflect the intricacies of the security. Sometimes, exact support and resistance levels are best, and, sometimes, zones work better. Generally, the tighter the range, the more exact the level. If the trading range spans less than 2 months and the price range is relatively tight, then more exact support and resistance levels are best suited. If a trading range spans many months and the price range is relatively large, then it is best to use support and resistance zones. These are only meant as general guidelines, and each trading range should be judged on its own merits.

Returning to the analysis of Halliburton (HAL), we can see that the November high of the trading range (33 to 44) extended more than 20% past the low, making the range quite large relative to the price. Because the September support break forms our first resistance level, we are ready to set up a resistance zone after the November high is formed, probably around early December. At this point though, we are still unsure if a large trading range will develop. The subsequent low in December, which was just higher than the October low, offers evidence that a trading range is forming, and we are ready to set the support zone. As long as the stock trades within the boundaries set by the support and resistance zone, we will consider the trading range to be valid. Support may be looked upon as an opportunity to buy, and resistance as an opportunity to sell.
Cable: Slang for the GBPUSD currency pair. Due to the rate originally being transmitted by a transatlantic cable, the name stuck.
Daily Candlestick Chart for DLKM
[img]stockcharts.com/c-sc/sc?s=DLKM
Cup With Handle: Resembles a cup and a handle on the chart. Hence the name "cup with handle." Shows where a bullish trend can possible begin.
Conversion Rate: A rate of a specified currency for converting all profits and losses into U.S. dollars.
Daily Candlestick Chart for HOKU
[img]stockcharts.com/c-sc/sc?s=HOKU
|
Followers
|
3289
|
Posters
|
|
|
Posts (Today)
|
0
|
Posts (Total)
|
2804248
|
|
Created
|
08/22/10
|
Type
|
Free
|
| Moderator Nilbud | |||
| Assistants mick ManicTrader PhotoChick Kirimi $Pistol Pete$ | |||
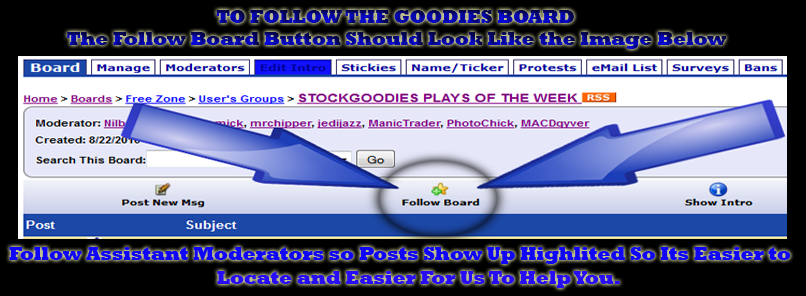
   Investor Hub Alerts: Sign up for 'STOCKGOODIES PLAYS OF THE WEEK ' E-Mail List Investor Hub Alerts: Sign up for 'STOCKGOODIES PLAYS OF THE WEEK ' E-Mail ListUPDATE; 5-1-22 courtesy of charting /\ wit tweezer top calls /\ Tony @Montana_Trades Really good study sheet on Candlestick Patterns [-chart]pbs.twimg.com/media/FRn8188XMAAdZvk?format=jpg&name=small[/chart] 

02-07-2021
|
|
Posts Today
|
0
|
|
Posts (Total)
|
2804248
|
|
Posters
|
|
|
Moderator
|
|
|
Assistants
|
| Volume | |
| Day Range: | |
| Bid Price | |
| Ask Price | |
| Last Trade Time: |