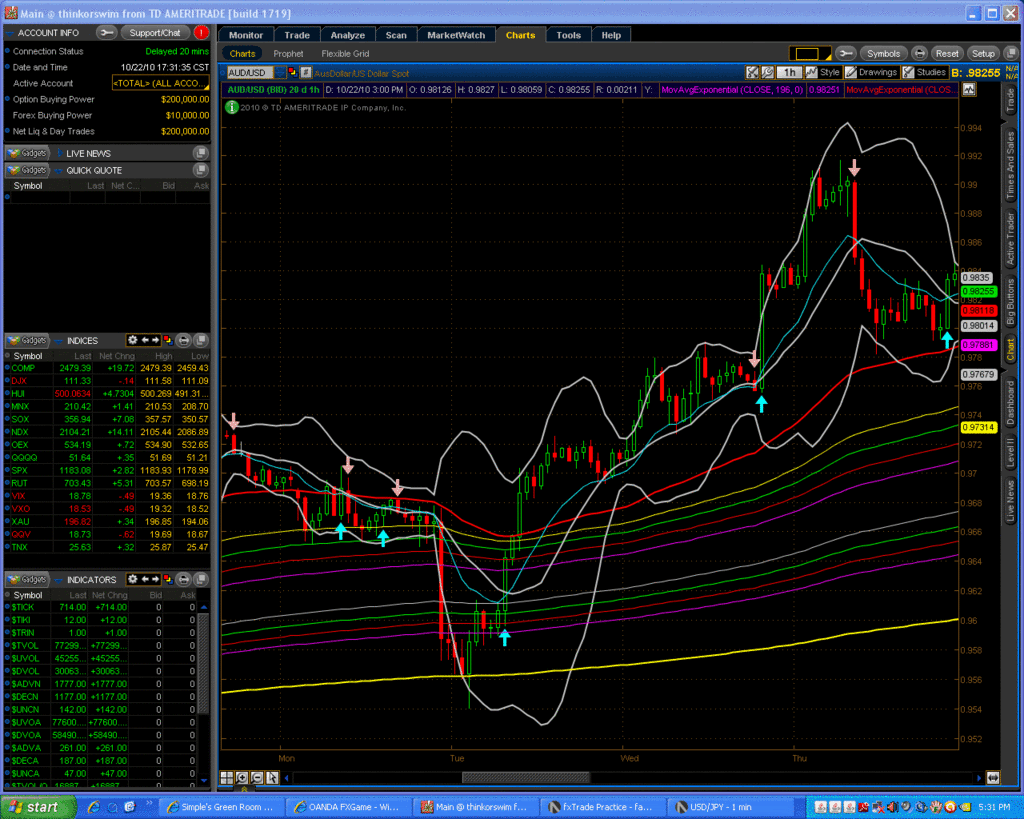
In this part we will revisit the same one hour chart on AUD/USD as in first installment.Notice that the bounce from EMA(676) stopped and retraced at top of lower tunnel..this is normal...but once it dropped to bottom of long term tunnel it advanced again and EMA(13) crossed above mid bollinger and as long as the EMA(13) is above mid bolie the advance continues...BTW the mid bolie is evident and colored white..the EMA(13) is colored cyan. This trend will continue upward as long as price is supported by the mid bolie/EMA(13). When profit taking took effect it broke through to the downside but then supported at EMA(62)..the red line...as seen on right hand part of the screen...this also is perfectly normal trading action.Here is the same chart as last one on AUD/USD to once again show points of importance in this post.
Register for free to join our community of investors and share your ideas. You will also get access to streaming quotes, interactive charts, trades, portfolio, live options flow and more tools.


 News
News  Market Data
  Discover